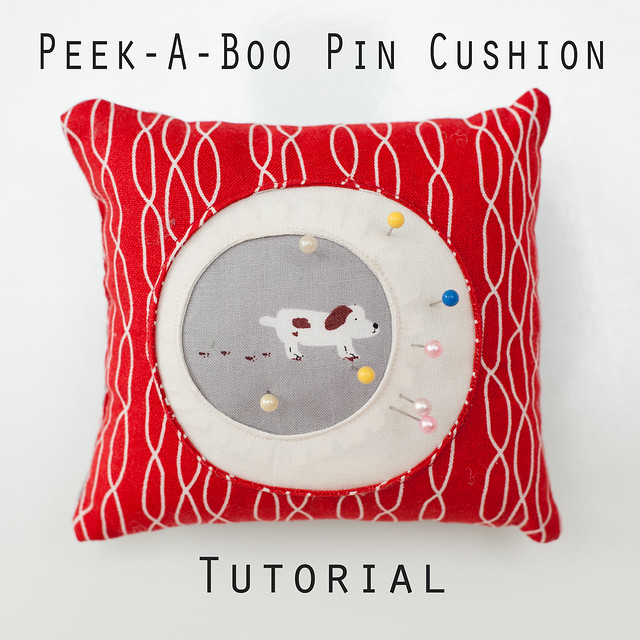
My partner on the PillowTalk swap on Flickr asked for circles to be included in her cushion design and so I have spent a bit of time over the last couple of weeks experimenting with circles. Last night I also made her a pin cushion to match in the same style and decided to turn it into a tutorial. This is actually my first tutorial so all feedback will be much appreciated...
What you need. Fabric for your fussy cut centre, fabric for the middle circle, fabric for the pin cushion front and reverse as well as a pen/pencil/marker and two different size circles. In this instance I used the top and bottom of a glass bowl. The key to it all is that the smallest circle needs to be the same size as the area of fussy cut fabric that you want to show through.
Start by cutting two squares of your middle fabric, and place them right sides together. The size of your fabric will depend upon the size of your smaller circle.. Allow the top fabric (wrong side up) to be about an inch wider all round than your circle template and the fabric beneath (right side up) to be about two inches wider.
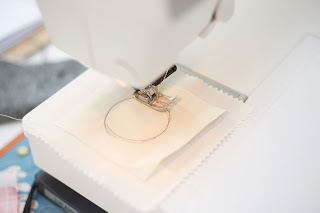
Then sew the two layers together by sewing around the circle you have drawn.
Next cut a hole in the centre of your circle going through both layers.
And take the middle out of the circle leaving about a quarter of an inch margin between the hole and the stitching
Snip around this quarter inch margin circle being careful not to cut through the stitching of the circle.
Pull the smaller piece of fabric through the hole and onto the wrong side of the larger square
Once it is pulled through, iron in position. (I repeat this step with the red fabric further down which may make it clearer)
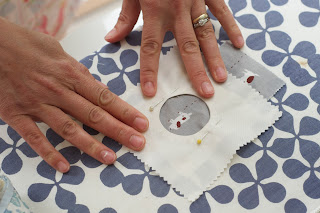
Place the square right side up on top of the fussy cut fabric, position and pin in place.
Then top sew around the circle close to the edge.
Next check the size of your larger circle by placing your template on top of your middle fabric. You can see here that this shows how much of the cream fabric will show through at the end.
Once again cut two squares of fabric (the larger of which will be the size of your pin cushion) and place them right sides together with your larger circle template on top. I don't bother to accurately cut the fabric at this stage, as all the stitching, pulling and ironing tends to warp it out of shape. It's easier to do it roughly and then trim when that bit is done.
Sew around your circle and cut the middle out.
Pull the fabric of the smaller square through to the wrong side of the larger square
Turn over and pin the top layer to the middle layer (with fussy cut fabric attached)
Top sew around the circle on the top layer, attaching fussy cut layer + middle layer to top
Trim the top layer down to a neat square/rectangle and cut a piece of the bottom fabric to match. Place right sides together and sew the back to the front leaving a gap of a couple of inches in one side to allow you to turn it inside out and fill it. Then trim the corners off.
Using the gap you left turn the pin cushion out.
Stuff with a filler of your choice and hand sew up the gap.
Ta-dah! One pin cushion. You can also use this principle for larger cushions or indeed quilt tops. Let me know how you get on or if anything isn't clear.
PS - I would like to make it clear that yes, I am wearing an apron in these photos and no I don't normally wear it to sew, but I was multi-tasking and baking bread at the same time.. Must sort out my sewing wardrobe next time!


Great tute. That is a cute pincushion.
ReplyDeleteI am always slightly wary of attempting a double porthole because I think I'll end up cutting the first porthole out but you have made it seem so clear.
...and how impressed are we, sewing and baking at the same time!!
Neat - now where is that dog going...
ReplyDeleteWay cool. I'm definitely going to use your technique to make my own version of the awesome pillow you made for your PTS partner because I just love it so much!
ReplyDeleteThank you so much for the tutorial, I love it! (adding ti Pinterest now). By the way: I love your apron.
ReplyDeleteI really like this! I'd feel sort of odd sticking my regular boring pins into a picture of an animal or something else cute, but I guess that's what the other fabrics are for. It reminds me of the porthole of a ship.
ReplyDeleteI'd love to see something like this on Kollabora, the online crafting community. I always enjoy meta projects that facilitate future crafting, but I can't usually be bothered to make my own tools until I see inspiring examples.
Congrats !!! this is a very easy proyect and you are a good teacher...!!! Thanks so mucho for your tutorial...
ReplyDelete