Friday, June 28, 2013

Another shopping tote and a winner!

Union Jack Shopping Tote

The decrease in sewing output that plagued me earlier this month is over, temporarily at least. I've even had time this week to make another shopping tote for me!

Normally being the second recipient of any sewing project means you get the improved version, but in this case I substituted the canvas fabric I used on the last bag's base for a denim fabric, it's fine, but not as good as the original and it doesn't stand up so well, so I will revert to the canvas for the next one.

Thank you to all of you who entered the Terry's Fabrics cushion giveaway. Random.org picked the winner from the comments left...


And it's Claire Holmes. Congratulations Claire, I'll be in touch to get your address. In the meantime hope everyone has a great weekend, I'll be back next week with a post about our annual Canada Day celebrations...
 
Follow on Bloglovin

Monday, June 24, 2013

Terrys Fabrics competition and giveaway

campercushion

I was contacted by terrysfabrics.co.uk last week who are running a competition for bloggers. They are offering creative bloggers two 1/2 metres of fabric and a cushion form for free to make an 18x18" cushion. In return one of those cushion designs will then win a £250 voucher.

From Terry's selection I chose the medium vichy 9274 curtain fabric rose (pink gingham) and the camper van pink fabric to work with. Both are heavyweight (ideal for curtains or bags like my shopping tote) and the camper van has quite large motifs which are great for fussy cutting.

I mixed my selected fabrics with some Kona snow and pink polka dot ribbon to create the quilted front of my cushion and I used the medium vichy to make an envelope back.

campercushion2

I think this kind of design would be perfect for a pre-teen girlie bedroom and as Terry's Fabrics have been so generous with their materials, I thought I'd share that generosity by giving you a chance to win the completed cushion including the form.

GIVEAWAY CLOSED So if you fancy winning my girlie pink camper van cushion all you need to do is leave a comment on this post before midnight on Thursday 27th June 2013. I'll select a winner on Friday so make sure you check the blog then. UK residents only I'm afraid due to postage costs.

Follow on Bloglovin

Saturday, June 22, 2013

Bloomin Quilt As You Go Cushion

bloominpillow

I have been very slack on the crafting front recently, I haven't sewed in weeks. The fabric I cut out for my shopping tote is still sitting on our kitchen table and my list of projects is getting longer not shorter.

Mostly it is because I have got heavily involved in a wonderful and important local project to save an ancient orchard. It's stimulating and enjoyable, but I still wish there were more hours in the day and I could take on more things, and still do all the other things as well. Don't we all?

Anyway, today I finally have a finish! This is my Bloomin Quilt-As-You-Go cushion....

Observations on making it? Firstly it takes up a lot more fabric than you expect, so be prepared. The blue on the edges of my cushion front were a natural progression, but not part of the original plan. Secondly the quilt-as-you-go method is lovely! Very precise, very neat, very therapeutic, I'll be doing it again. And finally, in retrospect my design turned out a little too square, next time I do it (and I will do it again) I will make sure to use an odd number of strips on each layer to give it a rounder shape.

bloominpillowback

The back is part of my journey to make friends with zips! I love the finish they give, but hate putting them in! I used Chrissie D's tutorial and despite the fact I sewed it with the flap up first time, and had to unpick and resew, the result looks ok... I think zips and I are on the way to being friends! As they say, every day is a school day! 

Oh and one other thing. I have after many months of indecisiveness, switched the domain of this blog to maybushstudio.com. Blogger says anyone following on the old blogspot domain should be forwarded, but if you could leave a comment to say you've seen this it would help reassure me!

Follow on Bloglovin

Monday, June 17, 2013

June's big gardening project...


Hedge removal

As most of you will know, although we bought our home 4 years ago, Jim's Army postings have kept us from living in it until earlier this year. Those years of anticipation have in some cases allowed us to slowly formulate ideas about what we wanted to do with the house and garden, but in other cases have just proved a frustrating delay to things we have wanted to change from day one. June's garden project falls in to the latter category!

Along our southern boundary there is a strip about 5 metres wide where the previous owners had planted out a wide flower bed, then a path, then a hedge. Over the time we were away and the house was rented, this area took on a life of its own. Brambles grew into the hedge and weeds overtook the flower bed, it was a mess and it obscured our view.

This was what it looked like when we bought the house, with the hedge overgrown (even in winter) to the point where the view is obscured, and no fencing (I was looking at these photos last night and wondering how we ever had the vision to buy the place!!)


And at its tidiest (not that tidy!) with a new fence in late 2009...


This is it taken from our roof at first floor level in March this year, showing where the flower bed has (mostly) been stripped.


After a very discouraging spring (weather wise) we finally decided at the start of this month to tackle it at full speed, encouraged by the fact we are planning a party on 30th June. We also decided rather than fighting the brambles, to rip the hedge out and start again.

And this is what it looks like after this weekend's work...

Hedge removal

With the view now clearly visible at ground level...

Hedge removal

We have done well with our hacking and burning so far, but are getting a quote from the professionals to turf.  So the big question remains, do we leave it open or replant the hedge?

The view is far better without, but perhaps when the winter wind is whipping across the harbour and the field on the other side as died down we may miss it. I guess the safe option is to try a year of living without before we make a decision...

Follow on Bloglovin

Friday, June 14, 2013

In the garden...

kidsgrowwild1

It has not been the easiest of weeks this week. Theo has spent most of it up and down with a fever and has been very clingy and very tired for most of it. It's been hard to engage him in anything (even CBeebies) and it's been doubly hard for me to get anything at all done. None of this helped by the weather going off and all of us being confined to the house...

Then like a miracle right at the end of the week, the clouds parted, the sun came out and a package arrived from moneysupermarket.com containing a mini gardening kit for their #KidsGrowWild challenge.


In all honesty given Theo's track record this week, I didn't think it would hold his attention, but he became totally absorbed in planting the seeds and it turned into the easiest few hours I've had with him all week!

There were three seed packs in the kit. We chose to plant the "Pretty Flower Family" ones first in two pots next to my planter full of lettuces.


Encouraged by how well that went down we also opened the sunflower seeds and planted them in an old trough...


With a little help from Bella the dog...

kgw_double3

It amazed me how he got the hang of it. How does a not-yet-two-year-old brain work out that the contents of a strange packet go in the soil? And then an hour later remember that they are called "seeds" and to show them to his Daddy? 

kidsgrowwild8

This gardening thing has been a surprising hit with the boy. I suspect he shall be asking to do it again, but he might need some time to fully grasp what that watering can is for...


This post is an entry for BritMums’ #KidsGrowWild Challenge. Entrants have a chance of winning 1 of 2 £50 Toys R Us vouchers or £500 to spend on a climbing frame or other outdoor equipment.

 
Follow on Bloglovin

Saturday, June 8, 2013

Beach Hut Shopping Tote

Market tote

We're off to a barbecue tomorrow at the house of some relatively new friends. I found out a few days ago that it's not just a barbecue, but also the hostess birthday. She's a fellow crafter so it followed that the gift would be handmade and I settled on making a shopping tote (because they're useful for everyone surely?) Only after I made it did I realise that actually it's strangely appropriate...

We met these new friends because the host started a conversation with Jim at our local train station about his bag. Yes you read that right, two men, at a train station, talking about bags. Weird.

So it is a bag that was our introduction and now it will be a bag that will be our gift. There's a joke in that somewhere.

I used the Bijou Lovely market tote tutorial and the beach hut fabric is decor weight cotton by Clarke & Clarke. Only thing I did differently is not bothering with interfacing and scrimping a little by using some curtain lining I had for the interior.


I also added the personalisation which is an idea I stole from Prada (dahhling!) I saw these bags in a Grazia quite a while ago and have been meaning to do something similar...


One of the great things about giving handmade is that you can personalise, so I try and do it all the time. The letters are felt attached with Heat N Bond ultra (no sew) and the font I used is Collegiate which you can download from dafont.com

I have to say I'm really happy with the end result, in fact so happy that I think I'll be making one for myself next week...

Wednesday, June 5, 2013

WIP Wednesday (5th June 2013)

My blogging friend Liz posted this week about losing her sewing confidence, which I think is something we've all been able to relate to at one point or another. This last pillow swap has literally given me sleepless nights with feelings of inadequacy and anxiety, so I'm quite relieved it's over and ready to move on...

I thought the best form of therapy for me would be to make a couple of pillows for myself and to try out all the things I want to try (different closures, zips, binding) without the pressure of worrying I'll screw up. So first up I'm trying the Bloomin Quilt-As-You-Go pillow.

bloominprogress1

bloominprogress2

I started it on Monday and have absolutely loved the way it evolves, though I've already realised it's not quite as I intended as the bloomin is more square than others I have seen on Flickr.  Still it's proved to be quite a relaxing activity during the light evenings after Theo has gone to bed...

eveningsewing

Unfortunately it has made me realise I'm in dire need of a cutting mat upgrade. My 18 x 24" is just too small for trimming a pillow/cushion to size on. Looking at the prices I realised why I have put off buying one for so long! Urgh...

As far as quilts go, a small update on my grand project of our bed quilt. This project has been ongoing for years. I find it utterly impossible to stick with an idea for more than a week. A month or so ago I convinced myself I was definitely making a log cabin, and it would be co-ordinating fabrics. I bought the fabrics, made two blocks and hated them...


So then I decided I needed to make it scrappy and multi-coloured. I bought more fabric, made two blocks and hated them...


So now I don't know what to do! I really want to create a beautiful long-lasting quilt for our bed and to invest the money in getting it longarm quilted, but I don't want it to be in fabrics or a design that will date or tire. Any suggestions anyone?!

WIP Wednesday at Freshly Pieced

Saturday, June 1, 2013

Room For Improvement - The £50 room makeover

Moneysupermarket.com have given a handful of creative British bloggers £50 and challenged them to makeover a room in their own houses.

As you know things in our house are a little temporary at the moment. A lot of things are lacking a proper home, whilst others are in places that will serve different purposes in a years time. As a result our own bedroom has been very neglected.


I can tell you that the exact thought process that went into decorating this room was "that big picture is getting in the way, lets stick it on the wall." The end.

So with £50 in my pocket I wondered if I could give our bedroom a bit of modern hotel chic. Painting would have blown the budget completely, so this is what I did...

gronolight_price

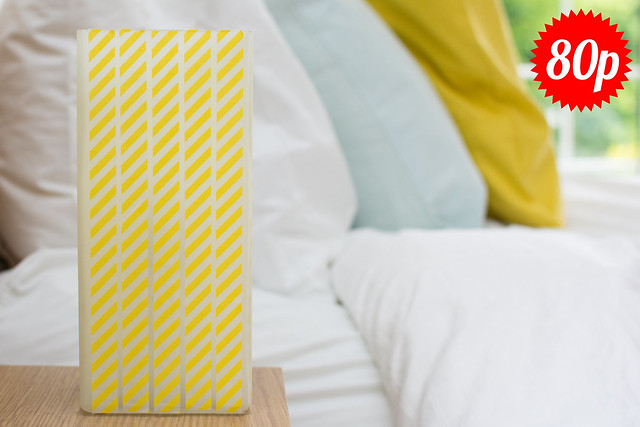
Ikea Grono light madeover with Washi tape - 80p

These Ikea Grono lights originally cost us about £4 each. They are functional if a little dull. I used about quarter of a roll of washi tape (from this shop on eBay) on each of the lights, adding five strips to each side. It took about 5 minutes.

duvet_price

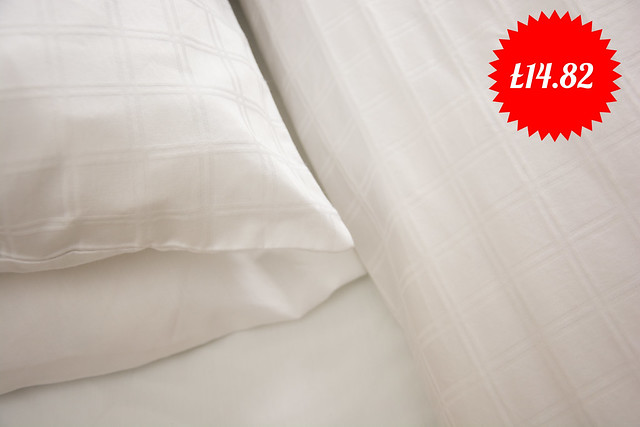
Duvet cover - £14.82

About six months ago I accidentally put our white duvet cover in the wash with a yellow duster and it came out highlighter pen yellow, I was devastated. I was pretty sure there was absolutely no way I'd be able to afford to replace it as part of this makeover, but with the help of some forgotten Tesco clubcard vouchers and some Quidco cashback, I saved over £20 off the retail price. If you are looking to achieve a similar budget duvet cover, you can pick up similar white ex hotel duvet covers on eBay for about £15.

pillows_price

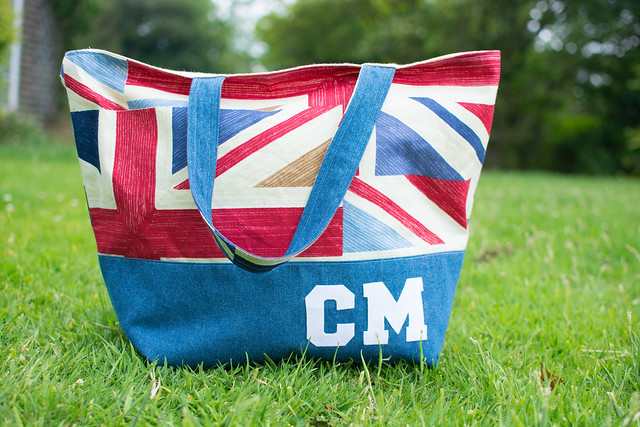
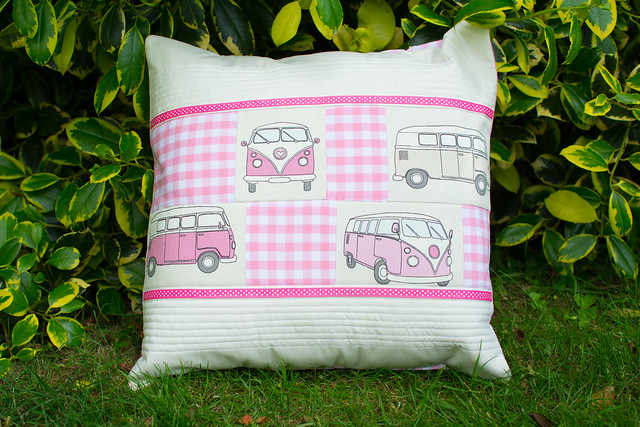
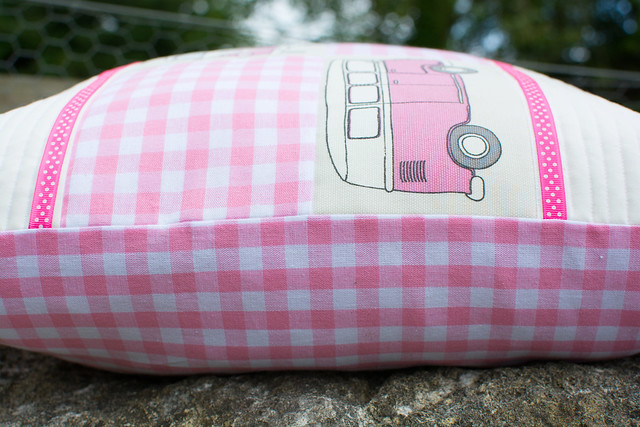
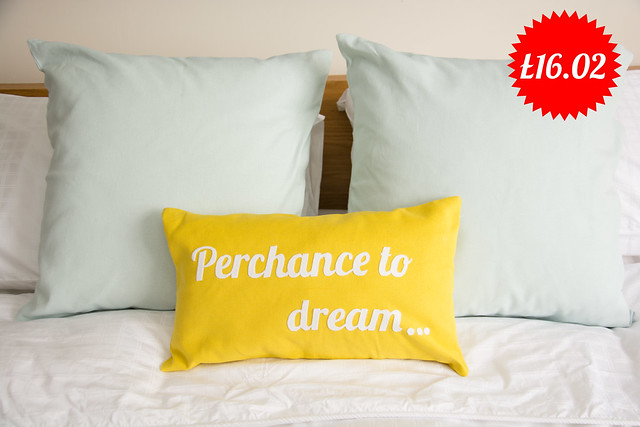
Cushion covers and inners  - £16.02

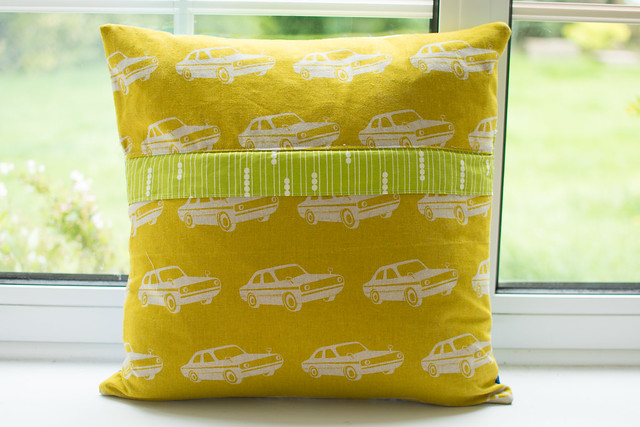
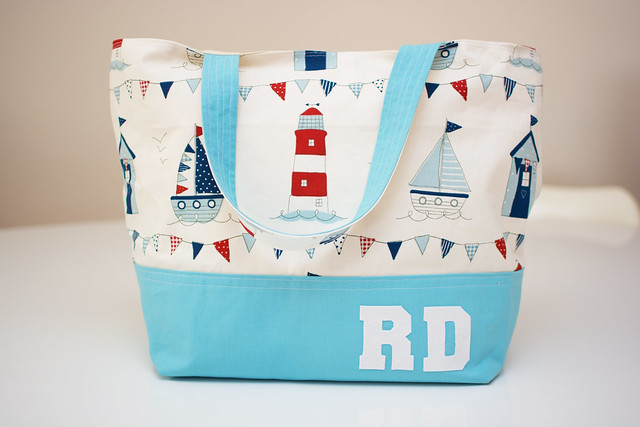
Previously our bed decoration had extended to one overgrown feather pillow which was unceremoniously thrown on and off the bed every morning and evening. It's a sad fact that it's actually cheaper to buy ready made cushion covers than it is to make your own! So I purchased two new cushion forms and three covers. Then I cut the yellow cover down to size, used Heat N Bond Ultra (no sew) to affix applique letters and stuffed it with filling reused from a pregnancy support pillow.
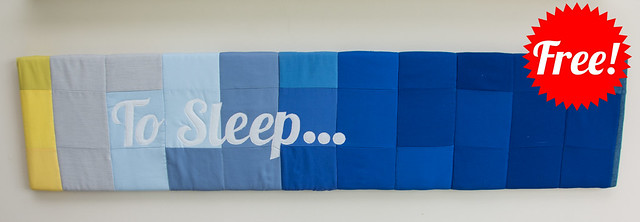
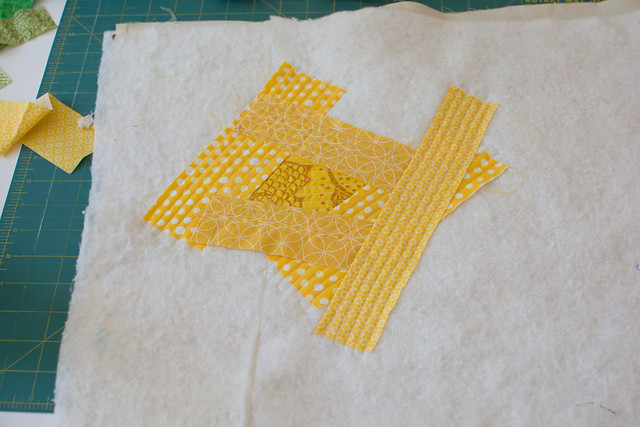
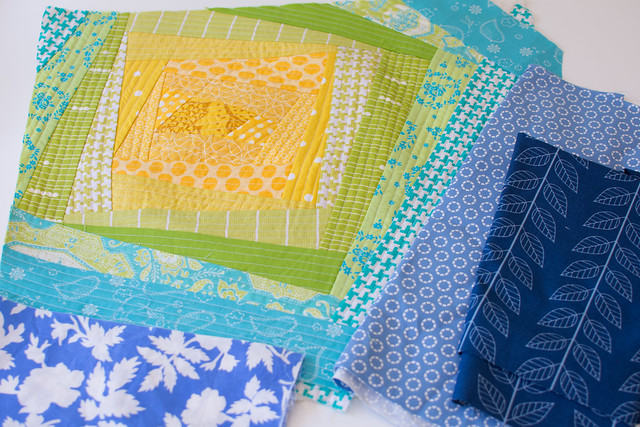
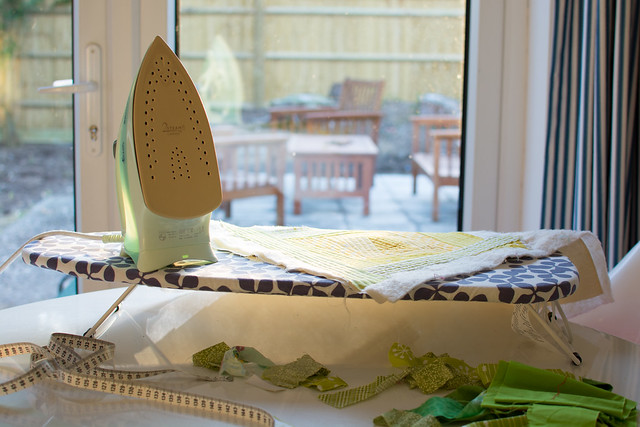
wallart_price

Wall art - FREE!

I spent a lot of time browsing Pinterest looking for budget wall art ideas and eventually realised that particle board was the key! Better still my dad is currently doing some building and has loads of offcuts in a skip. However if you rumage in skips for things, you don't get to pick the size of them. I had originally hoped to make something based around particle board that was about a metre square, in the end the piece I scavanged was a lot smaller so I had to come up with a new idea. The fabric I used to cover it is a mixture of recycled shirts and Kona cotton. It's all stuff I had already but even if you were to buy it, you could achieve the same thing for about £5.

ribba_price

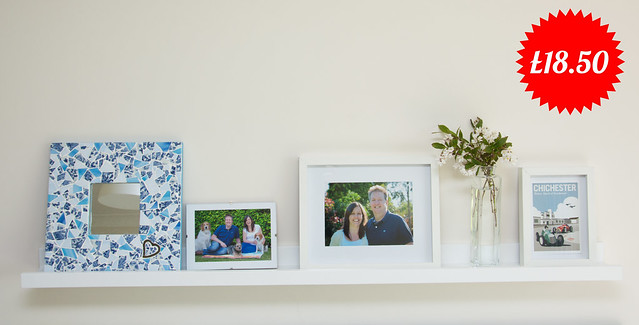
Ribba picture shelf & pictures - £18.50

Having discovered my wall art was a lot smaller than I first intended, my last purchase was an Ikea Ribba picture shelf for £8.50 along with two white picture frames (£3 & £6) and a small vase (£1) from Tesco. The mirror and clip frame were things we already had.

And here's what it look like all put together.

bedroomafter_price

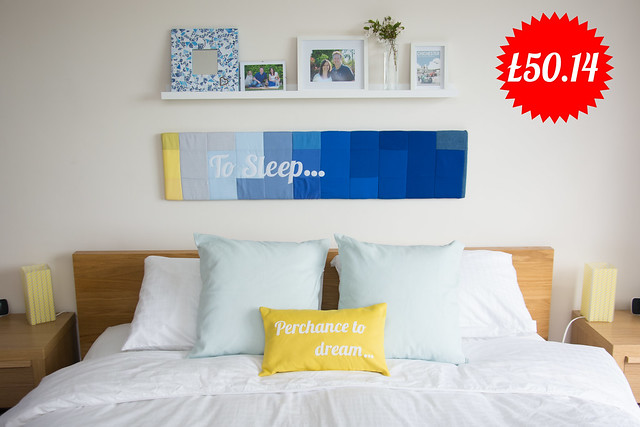
And the results side by side...


I must admit this whole project has been a bit of a revelation to me. As well as being a surprise discovering how far £50 can go, it was also (honestly!) a bit of a surprise to open my eyes and see how rubbish our bedroom looked! All of this has been great practice for the dressing our proper master suite when the remodel of the house is complete.

One of the bloggers taking part in the Room For Improvement project will also be selected at random to win £500 of B&Q vouchers. As we will soon have two bathrooms and three bedrooms to kit out, it would be fun seeing how far I could make that go...
Related Posts Plugin for WordPress, Blogger...