Friday, May 31, 2013

PTS 10 - complete!

PTS 10 - Complete

I finally finished my Pillow Talk Swap 10 cushion this week, but have spent a few days waiting for the right size form to arrive ito photograph it. My partner on this swap has been VERY quiet, I haven't even seen what she's working on for her partner, so I have struggled a bit making something that's not so much to my tatste (not a massive fan of grey...or pink) with no real guidance.

As always the standard of this swap has been stupidly high and some days I've come away from looking at the Flickr pool feeling quite deflated and wanting to scrap my cushion and start again. Anyhow, I have learned a lot (wish I'd added binding/piping for one!) and I'm itching for the next swap to begin to that I can move forward, try new things and do it better next time.

So will you all do me a favour and let me know if you see any swaps recruiting? Particularly pillow/cushion ones or mini quilts?  I try to keep an eye on the Flickr groups, but there is often such a small window of opportunity, it's easy to miss the sign-ups...

Sunday, May 26, 2013

Joules goodies...

The kind PR folks at Joules sent me a goodie bag of their products last week. I knew of Joules through their clothing line (Jim bought me a fab hoodie last summer) but was quite surprised to discover their range includes homeware by Joules too.

Joules mug

This natty floral mug (pictured enjoy the weekend sunshine) is now making the rest of our crockery look decidedly shabby, it's already made me throw one mug out, it looked so bad next to it! I particularly like the fact it is what I'd call a "man-size" mug, but with a bit of ladylike elegance to it!

They also have a great range of umbrellas, including a doggy one with little Bella Beagles on it, and dear friends, I did try to get a photo of Bella next to the umbrella and it just wasn't going to happen.

They have gorgeous doggy wellies too, which I think I am a little bit in love with. Can a girl ever justify owning three pairs of wellies... even in a summer like this? I might try...

And for the man of the house there was also a bit of Joules lovliness. How about these for Father's Day? 


I must tell you Jim was quite terrified that I'd actually make him model them for the blog - Ha! But no, I was content with chuckling at the seaside humour in the design. Pants that make you laugh? That's always a winner for me..  Thank you Joules!


Saturday, May 25, 2013

Photoworld winners...


Congratulations to Di Coke, Lynsey Buchanan, Jan, Dandelion Liz and Archie The Wonder Dog who are all winners in my Photoworld Giveaway. I have emailed you all to give you details of how to claim your £25 voucher. Congratulations and I hope you enjoy your prizes...

Wednesday, May 22, 2013

The first look at our new house


We sent off our application for planning permission for the remodel of our house last week and our fantastic architect (who's actually a structural engineer) sent us some 3D projections of the house yesterday. It's our first opportunity to see what it will look like when it's complete and the appearance is a long way from the century old bungalow that currently stands on the site.

Some of the ground floor windows will be replaced and a first floor extension will be added, but almost all of the internal ground floor space will stay the same. It won't be quite as grey as it appears in these pictures, nor will the grass be blue!


Now we must wait patiently for the planning committee to make their decision which should be in another two months. It's unlikely we'll be able to start work this year, but I'm quite happy enjoying the journey. Our next step is to choose the colour of our cladding, though I'm sure the cpuncil will have something to say about that too!


PS - A reminder for UK readers to go to this post for a chance to win Photoworld vouchers. The giveaway closes on Saturday...

Saturday, May 18, 2013

Peek-A-Boo Pin Cushion Tutorial

peekaboo tutorial

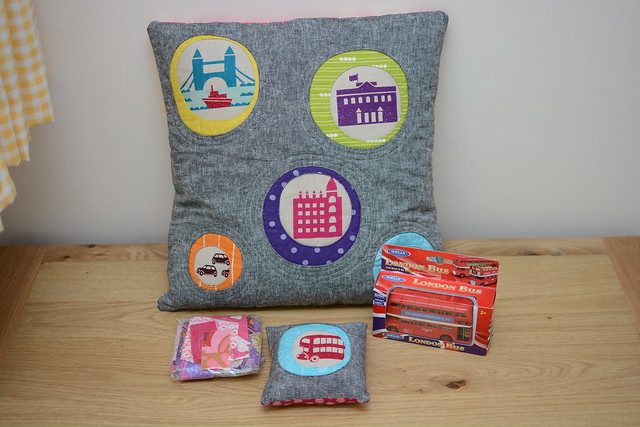
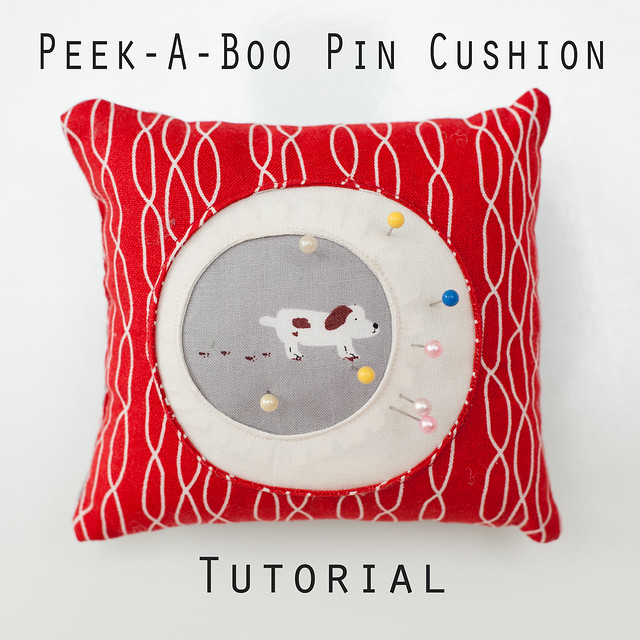
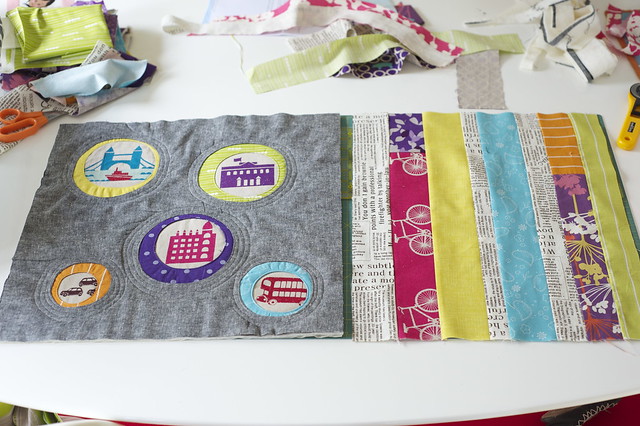
My partner on the PillowTalk swap on Flickr asked for circles to be included in her cushion design and so I have spent a bit of time over the last couple of weeks experimenting with circles. Last night I also made her a pin cushion to match in the same style and decided to turn it into a tutorial. This is actually my first tutorial so all feedback will be much appreciated...

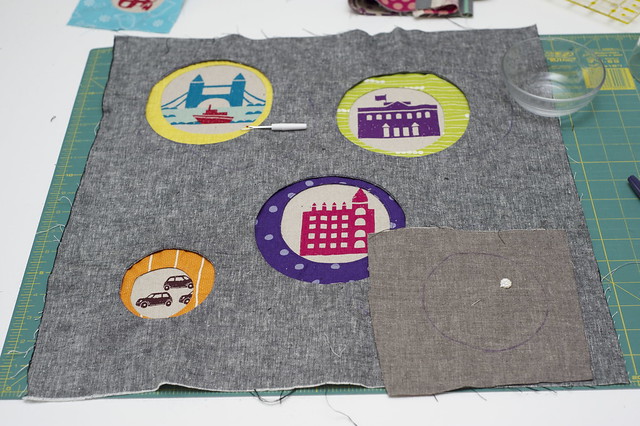
What you need. Fabric for your fussy cut centre, fabric for the middle circle, fabric for the pin cushion front and reverse as well as a pen/pencil/marker and two different size circles. In this instance I used the top and bottom of a glass bowl. The key to it all is that the smallest circle needs to be the same size as the area of fussy cut fabric that you want to show through.


Start by cutting two squares of your middle fabric, and place them right sides together. The size of your fabric will depend upon the size of your smaller circle.. Allow the top fabric (wrong side up) to be about an inch wider all round than your circle template and the fabric beneath (right side up) to be about two inches wider.


Then sew the two layers together by sewing around the circle you have drawn.


Next cut a hole in the centre of your circle going through both layers.


And take the middle out of the circle leaving about a quarter of an inch margin between the hole and the stitching   


Snip around this quarter inch margin circle being careful not to cut through the stitching of the circle.


Pull the smaller piece of fabric through the hole and onto the wrong side of the larger square

 
Once it is pulled through, iron in position. (I repeat this step with the red fabric further down which may make it clearer)


Place the square right side up on top of the fussy cut fabric, position and pin in place.


Then top sew around the circle close to the edge.


Next check the size of your larger circle by placing your template on top of your middle fabric. You can see here that this shows how much of the cream fabric will show through at the end.


Once again cut two squares of fabric (the larger of which will be the size of your pin cushion) and place them right sides together with your larger circle template on top. I don't bother to accurately cut the fabric at this stage, as all the stitching, pulling and ironing tends to warp it out of shape. It's easier to do it roughly and then trim when that bit is done. 


Sew around your circle and cut the middle out.


Pull the fabric of the smaller square through to the wrong side of the larger square


Turn over and pin the top layer to the middle layer (with fussy cut fabric attached)


Top sew around the circle on the top layer, attaching fussy cut layer + middle layer to top


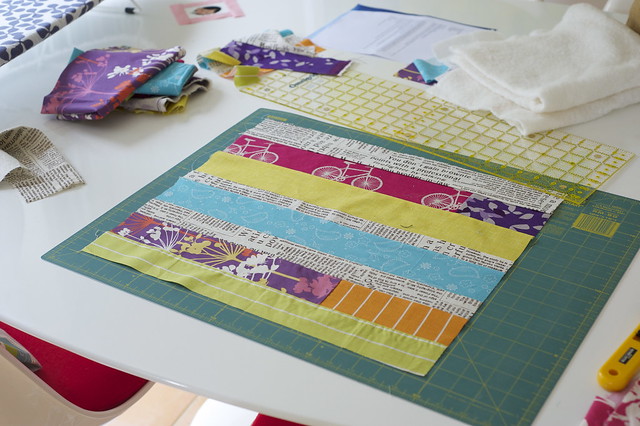
Trim the top layer down to a neat square/rectangle and cut a piece of the bottom fabric to match. Place right sides together and sew the back to the front leaving a gap of a couple of inches in one side to allow you to turn it inside out and fill it. Then trim the corners off.


 Using the gap you left turn the pin cushion out.


Stuff with a filler of your choice and hand sew up the gap.


Ta-dah! One pin cushion. You can also use this principle for larger cushions or indeed quilt tops. Let me know how you get on or if anything isn't clear.


 PS - I would like to make it clear that yes, I am wearing an apron in these photos and no I don't normally wear it to sew, but I was multi-tasking and baking bread at the same time.. Must sort out my sewing wardrobe next time!

Follow on Bloglovin

Friday, May 17, 2013

The wonder of acrylic wall art and giveaway!

Acrylic wall print by photoworld.co.uk 
I have a bit of a bee in my bonnet about what we put on the walls of our houses. It seems all to often people are happy to display the same generic art prints that hang in houses the world over, but keep the precious images of their families and friends on their computers or in albums. I'm not suggesting you turn your house into a gallery dedicated to your offspring, but I think the pictures in our houses should mean something.

I've tried lots of options for displaying photos over the years, but had a real revelation last year when we did our annual exhibition at Moray Camera Club. For the first time members were allowed to display their images, not just as conventional prints in frames, but also as canvases and acrylic and alluminium prints. One of our members Helen, chose to display her pictures as acrylic wall art and the moment I stepped into the exhibition her images instantly grabbed my attention.

Acrylic prints are photos printed on Kodak paper and displayed behind a thick sheet of acrylic. I don't completely understand why, but for some reason this gives them a very bright, colourful and modern look. Pictures really shine in this format in an astonishing way.

When the people at Photoworld.co.uk asked me to try one of their products, here was no debate about the product I would try or the picture I would choose. I picked an image of my son and mother from last year's canal boat trip in Wales and chose a 30x45cm print. It arrived within a week and the result was every bit as good as I'd hoped. Theo loved it, I mean really loved it. He wanted to take it to bed...


There were tears when I took it away!

So I am thrilled to be able to give you a chance to experience your own piece of photoworld magic, with a giveaway (hurrah!) 5 prizes, multiple ways to enter and you have until Saturday 25th to take part. Have fun!


a Rafflecopter giveaway

Wednesday, May 15, 2013

WIP Wednesday (15th May 2013)

A bit confused...

I'm not good at taking any length of time to complete a sewing project, because it often allows me time to go off the design between starting and finishing it.

I've suffered this problem more acutely than usual with my Pillow Talk cushion as I'm making it to accommodate someone else's tastes. I've now finished the front (second make) and started the back, and still I take it out every day or so and think I'll scrap it and start again. 

PillowTalk back

I finally plucked up the courage to post it in the group pool on Flickr today and received lots of positive feedback. So maybe it's just me?

Whilst I wait for my partner to comment I think I shall distract myself with a project for me. Perhaps the long overdue, much put-off quilt for our bedroom?

I have also had designs of other kinds occupying my mind this week. On Monday we agreed the plans for the first floor extension and external makeover to our bungalow. Those of you who follow me on Flickr may remember me posting a  picture of our architect's embryonic squiggle which he drew at the kitchen table when we met back in February. Judging by the lack of comments I think most people struggled to see much to get excited about! But I could see right from the start that he understood what we wanted, and now we have a much more official looking set of plans stuck to the fridge...

House plans

If you detect a slight North American influence in the design, it will probably be no surprise to learn that we spent the first two years of our married life living in a village full of weather boarded houses in Alberta in Canada, and we have dreamed of recreating a home like that ever since.

Mature student...

And on yet another design note, I have been accepted onto the college course I applied for, so from September three days a week I shall be studying graphic design and photography. I can't wait...

And finally a quick reminder to my UK readers, to pop back for a photographic giveaway here later in the week...

Once again I'm linking up with...

WIP Wednesday at Freshly Pieced

Wednesday, May 8, 2013

WIP Wednesday (8th May 2013)

Pillow Talk Swap cover

A week of varying success on the sewing/quilting front this week! I've spent most of it working on my cushion for the Pillow Talk Swap. Some people in the Flickr group work with a beautiful precise plan, which involves lots of sketches, fabric pulls and ordered progression.

I however like to start with a rough idea and fumble my way through letting the whole thing evolve on its own. This of course means I sometimes get halfway through making something and realise I could have got a better result if I'd done it slightly differently, which because I'm a perfectionist, means more often than not I do a lot of unpicking.

So this week has been mostly unpicking and redoing, and after all of that I still only have a completed pillow top. They'll be some trimming, quilting, a back and some binding still to come.

Consequently there's been no progress on Theo's neighbourhood quilt, but I have managed to make two applique children's t-shirts. One as a gift, and the other as an order for a little girl's first birthday and there's still another to make by the end of today...

Amelia's birthday t-shirt Charlie's tee

The yellow t-shirt is actually a replacement for an identical one I had packaged up a ready to send last week. It was sitting on the coffee table in a mailing bag on the Sunday night and by the Monday lunchtime had vanished! I'm sure the small boy is responsible, but so far no amount of hunting in dark corners has uncovered the original package - so frustrating!

Anyway, more quilt and pillow progress next week I hope!

 WIP Wednesday at Freshly Pieced

Monday, May 6, 2013

All in one all-day-breakfast fritatta

All in one breakfast fritatta

For some reason I skipped the eggy bread chapter in my childhood, but I have enjoyed discovering it late in life as a quick meal for Theo. This recipe brings together the genius of eggy bread with some hearty grown up fillings, and because it's oven cooked, we can even kid ourselves it's a tad healthier than a fry up.

Ingredients (serves 1, cooked in a tin 11.5cms across)


2 slices of bread
2 medium eggs
1 (pre-cooked) cold sausage
A couple of small mushrooms
A couple of cherry tomatoes
A little milk
Seasoning

*Pre-heat the oven to 200c
* First cut disc shapes from the bread. Shop bought white bread does the job best.
* Then whisk two eggs with a little milk in a shallow bowl and lay the bread discs in it to soak up the liquid for a couple of minutes.
* When the discs have soaked up most of the liquid, place one at the bottom of a metal tin and cover with thinly sliced mushrooms, then layer sliced sausage and tomatoes...


Finish with the last bread disc and cook for 12 minutes or until the top has browned.

It's also worth pointing out that there is one distinct advantage of this recipe over a plain old fried egg and sausage sandwich, which is that when you bite into it, the egg yolk doesn't explode all over you!

Frankly it is nothing short of a miracle I managed to photograph the end result, it smells fantastic cooking and it was inhaled by my husband within seconds of it emerging from the oven, so if that isn't enough of a recommendation, I don't know what is!

This post is my entry to the #eggmainsinminutes Linky on BritMums, there's more egg inspired cooking here.   EDIT 14/5/13 >>> This post was one of the winning entries in the Britmums #eggsmainsinminutes Linky!


Related Posts Plugin for WordPress, Blogger...